Showing posts with label install. Show all posts

Audi A3 2006 Audi A3 8P Concert II and Symphony II SAT Tuner Install

,

The following instructions are based on my personal experience and are in no way an official set of instructions. I provide no warranty whatsoever. If you use these instructions to install your own Audi satellite tuner, you do so at your own risk. I doubt Audi will cover any issues under warranty without charging you for the entire install. So, good luck.

These instructions are only tested for 2006 Audi A3 8P Concert II and Symphony II (BOSE) non-NAV

This process should work with either of the following SAT Tuners:

8E0 057 593A - XM
8E0 057 593 - Sirius

These tuners can be purchased at your local Audi dealer, eBAY or web vendors like http://www.clairparts.com/

This is a super ez mod consisting of the followoing steps that (according to Audis instructions) must be performed in this order:

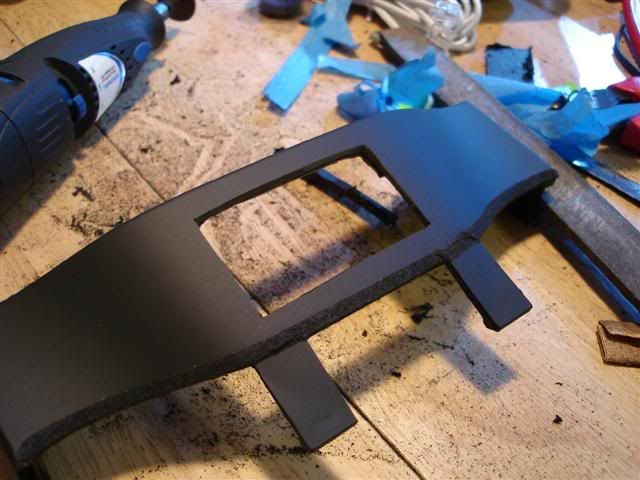
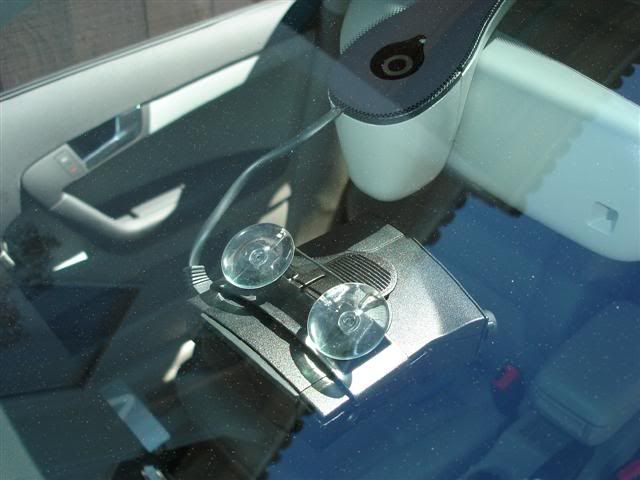
  1. Install the tuner in the space provided on the left side of the boot area.(FIG 1)
    • lift plastic cover, there are 2 clip holes. A small screwdriver or a key will open easily. (Arrows in FIG 1)
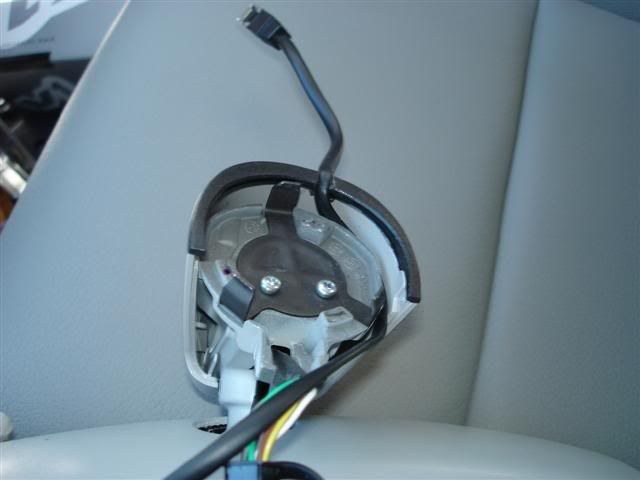
    • Locate foam wrapped cable ends (FIG 2)
    • carefully clip zip ties from factory and unwrap the plug ends
    • remove bypass loop plug from CAN cable (FIG 3)
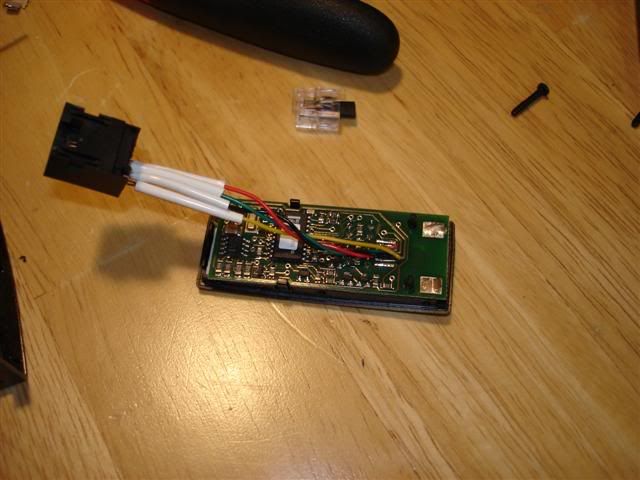
    • plug cables into sat tuner (FIG 4)
    • slide SAT tuner into the mounting bracket. Fit is very clean.
    • secure with 2 very small zip ties (FIG 5)
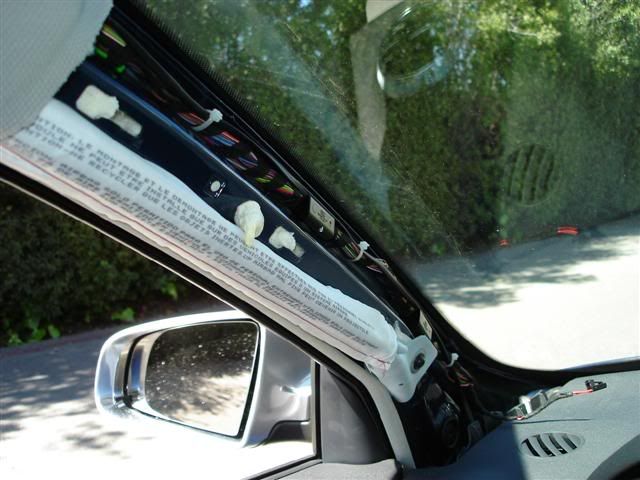
  2. Remove passenger side kick plate by door and connect CAN bus plugs
    • Carefully remove kickplate cover - Typical VAG plastic part with metal clips. Requires a firm tug in strategic places to remove w/o breaking anything. Take it slow and be careful. The plastic above the top clip needs some care to remove without stressing the plastic (FIG 6)
    • locate cables, they are wrapped to exisiting wiring bundles with masking tape
    • remove tape, plug CAN connectors together (FIG 7)
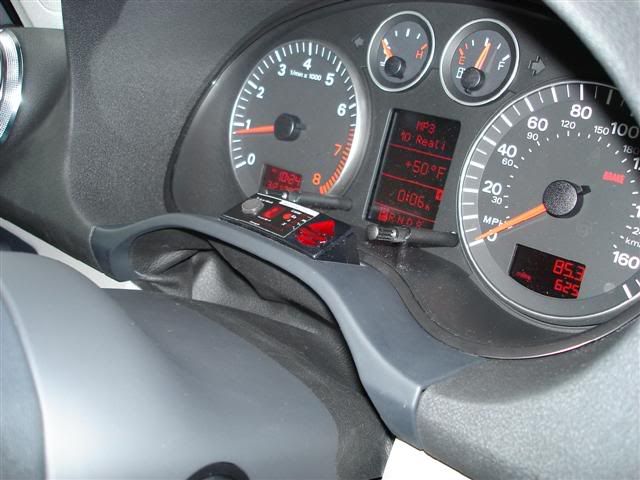
  3. Turn on car, press SAT button on stereo and tune to preview channel
    • Go to SAT vendor website and activate your SAT tuner, make sure unit is on and receiving signal when you do.

That was all I had to do!

You will notice no mention of VAGCOM, the official line from Audi, says you will have to use VAG COM, but I did not. I installed a Sirius tuner in a BOSE, SAT Ready, Non-Nav factory HU.

For your reference I am posting what I have been told needs to be done with VAG COM.

  1. Plug the CAN compliant VAG COM ito the A3 8P Dash port
  2. Select Option 56-RADIO
  3. Select Option 10-adaption
  4. Enter Channel number 99
  5. It will show -1- Slide bar to -0- Remember to Save Settings
  6. Display on VAG COMshould say that Value -0- was saved.
  7. Back out of the setting. Radio/SAT receiver should now operate.
  8. If you still see "No SAT Radio" when you hit the SAT button, you need to recheck the wiring. All CAN connections must be verified.

I plan to borrow a VAG COM to double check these settings, but I have been working 100% for a week without any VAg COM modifications.

Read more →

Audi A4 B5 Stratmosphere Shortshifter Install

,

Required tools:
1. 3/6mm allens (6mm allen should have an 8" reach)
2. Socket set with metric sockets, extension, ratchet 8mm and 10mm open end wrench.
3. Circlip Pliers
4. Torx25 driver
5. Loctite (although not a tool, also not supplied but HIGHLY recommended)
6. Shop towels to wipe your hands free of grease!
7. A friend is a valuable tool to assist you in the install, although not required
also highly recommended.


Step 1: is to remove the shift knob by turning the knob counter clockwise till
the knob is off. Then carefully lift up at the seem between the shifter assembly
cover and the center console as depicted by the red arrows.


Step:2 With a 10mm socket wrench, remove the 2 10mm nuts holding the foam padded
sound break.


Step 3: You will then see the core of your shifter assembly. Now with your 6mm
allen wrench remove the two bolts and the one metal plate that connected the
shifter linkage to the transmission linkage. They are loctited from factory
and so a standard allen wrench may not allow you to provide enough torque to
remove them. In this case, use a 6mm socket wrench adapter to remove these bolts.


Step 4: With the 2 6mm bolts removed, loosen the front 2 10mm nuts holding the
shifter "bucket". You do not need to remove these two nuts, just loosen.


Step 5:Completely remove the rear 2 10mm nuts. This will allow you to gain access
to the 4 torx bolts.


Step 6: CAREFULLY remove the 4 torx bolts (T25) that hold the shifter assembly
down. Be careful to not drop/lose one of the bolts between the shifter bucket
and the center console.


Step 7: Once you remove the 4 torx bolts, work the shifter linkage free from
the transmission linkage (bottom arm). Once thats done its easiest to get the
assembly out by pushing the top connection to the left as shown and pulling
the linkage out. It might take some work to get the assembly positioned to remove
it.


Step 8: With the shifter assembly out, take your circlip pliers and remove the
circlip that holds the linkage to the assembly.


Step 9: At the joint where the bottom linkage connects to the upper linkage,
remove the 10mm nut/bolt holding the linkage together. This will allow you to
remove the stock linkage from the assembly.


Step 10: Now remove the 2 rubber dampers from the flexible pivot cup, then
remove the pivot cup from the stock shifter linkage.


Step 11: Take the packet of silicon grease and liberally apply to the ball.
Install the flexible pivot cup to the Stratmosphere shifter linkage. Tie the
zip tie around the pivot cup. You should notice a decrease of slop/play in the
shifter. Do not over tighten.

Note: put the side with the notches facing upwards away from the bearings. Reassemble
the black dampers, the linkage should look like the following.


When replacing the circlip remember to place the metal spacer from the original assembly between the damper and the circlip.


Step 12: Assemble the lower portion of the linkage. Place one shim between the
bearing and the lower linkage on each side(3 were included, you only need 2)
Use a pen/small screwdriver to position the shim and secure with the provided
bolt and locknut. Tighten until the bolt does not spin freely, but do not over tighten.


The assembled linkage should look like the picture above. Note the position
of the lower linkage in relations to the shifter arm. The hole is facing the
bottom. This is crucial during reassembly.


Step 13: Now reassemble the shifter assembly into shifter bucket. Place one
of the 4 aluminum spacers under the ends of the 2 rails that hold the shifter
in place. Again be careful to not lose a spacer. Tighten down the 4 torx bolts
at this point.

Step 14: Reverse the disassembly process. First replace the two 10mm nuts at
the back, and tighten down the two in the front of the console. Now using the
unsupplied loctite you purchased, place a small amount on the thread of the
2 6mm bolts that connect the shifter linkage to the transmission linkage. This
is a very important step in preventing the bolts from vibrating loose
over time. Now position the shifter so that the bottom linkage is easily accessible,
reinstall the plate and the bolt. Do not completely tighten the bottom 6mm bolt,
you will adjust this later to ensure proper alignment of the assembly. Reinstall
the top 6mm bolt, again do not tighten completely. Now with both bolts partially
tightened, align the shifter in the position sliding it forward and back until
its sitting in the position you want it to be. Now tighten the two bolts (snug)
and reinstall your shift knob. With the engine OFF, test that you can
easily shift through each gear including reverse. Make sure that the distance
between shifting from neutral to third, and neutral to fourth is the same. If
you can engage all gears easily, and the bottom linkage doesnt come in contact
with the shifter bucket, tighten down the 2 6mm bolts completely. Now reinstall
the sound break, and the 2 10mm nuts that secure it. Carefully reinstall the
shifter cover/shift knob and take your car for a spin! Youre done! Now how
hard was that???? *DONT ANSWER THAT!* =)


Pictures used in this how-to are of Alans fingers and his gorgeous pearl white
A4.
Read more →

Audi A3 DIY Stealth Valentine One V1 Concealed Display Hardwire Install BWW

,
Heres my version of the V1 Stealth Hardwire.

1. Remove rear view mirror and notch out black portion.

2. Run wire in the headliner and down the pillar. Ziptie for good measure.

3. Run wire from fuse box area to drivers DIS. I removed the vent to make it easier.

4. Wire V1 to fuse box.

5. Notch out cover.

6. Rewire concealed display to have the phone jack coming out the back.

7. Reinstall and clean up. Happy motoring.

Read more →

BMW E65 66 Interface Install Manual

,
E65/66 Interface Install Manual~1. Before working, please make sure the vehicle power is off (please keep in mind when pulling out the key, only monitor supply would be off but whole vehicle power supply would be off 5 minutes later)2. Starting with separating of the monitor and the connector removed in working may causes a error code. Do not start until the work is done.3. Please use appropriate measure of tools.4. Do not force excessively in assembling or disassembling, tightening or pulling.5. Using protecting clothe or taping around the working area, take care of scars.6. Please make sure to connect the power cable using a fuse when you use it with pulling out the power supply.There are star shape screws on upper part of the monitor. Using exclusive instrument, loosen the screws and remove the monitor. Please be careful not to make scars on wood trim when pulling out the monitor. Sometimes it is not pulled out easily as the backside white connecter may be caught. Beaumont Texas Real Estate . Then lift up the dashboard slightly and it may be easily pulled out. There are two connecters on backside of the monitor. White one should be disassembled before the black one. Search Engines . Assembling order is the reverse of that of disassembling.

Download: BMW E65/66 Interface Install Manual
Read more →