Clean the mating surface and the valve hole of the aluminum wheel.
Install the tire pressure sensor and the washer to the aluminum wheel, and loosely install the valve nut. Make sure the pressure sensor is resting on the wheel.
NOTE: Install the tire pressure sensor so that the sensor housing surface should not exceed the wheel protrusion to prevent the sensor housing caught to the bead of the tire when assembled the tire.
Tighten the valve nut to the specified torque while holding the tire pressure sensor toward the wheel.
Tightening torque: 4 N·m (0.4 kgf·m, 3 lbf·ft)
Install the tires according to the instructions in the Service Manual.
Install the wheels on the vehicle and torque to 108 N·m (80 lbf-ft).
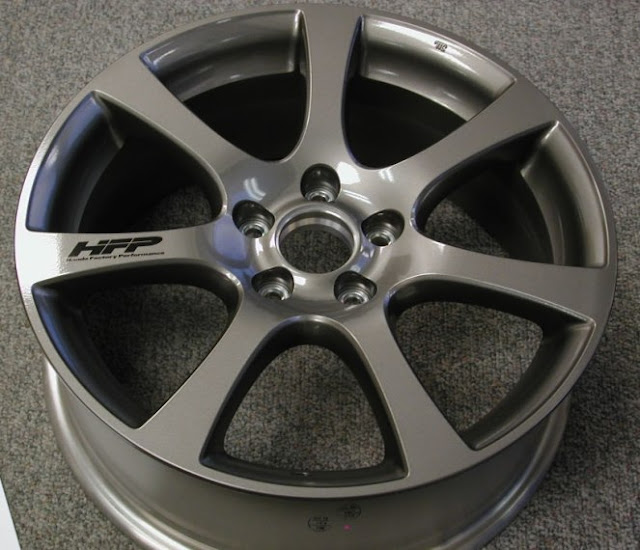
Manual 2009 Civic 2 AND 4-Door Aluminum Wheel Instructions Guide. Make your sport car more different and look cool by use this accessories. In this pdf book, you will know how to install with the right way.
Open the driver’s door. Using isopropyl alcohol, clean the area where the accessory tire pressure caution label will attach. Remove the backing from the label and attach it over the existing tire information label. Attach the tire pressure caution label or label C or label D according to the following information:
Label: For EX-L Model with a T125/70D15 95M
 Label C: For EX-L Model with a T135/80R16 101M
Label D: For EX-L Model with a T135/80D16 101M
Attach the “Supplemental Information” page included in this kit to the Owner’s Manual. For the method of attaching the page, refer to “To the dealer:” attached to the “Supplemental Information” page.
MEMORIZING THE TIRE PRESSURE SENSOR ID
Using the HDS and Snap-on TPMS sensor initializer tool, memorize the ID of tire pressure sensor ID according to the instructions in the Service Manual (Memorizing the Tire Pressure Sensor ID).
We found pdf this automotive pdf file from google search engine, and can be found from the original site at here www.hondapartsnow.com. We provide you direct
download from original site here Manual 2009 Civic 2 AND 4-Door Aluminum Wheel Instructions Guide.pdf. We hope this online pdf book will useful for you.
Read more →
Install the tire pressure sensor and the washer to the aluminum wheel, and loosely install the valve nut. Make sure the pressure sensor is resting on the wheel.
NOTE: Install the tire pressure sensor so that the sensor housing surface should not exceed the wheel protrusion to prevent the sensor housing caught to the bead of the tire when assembled the tire.
Tighten the valve nut to the specified torque while holding the tire pressure sensor toward the wheel.
Tightening torque: 4 N·m (0.4 kgf·m, 3 lbf·ft)
Install the tires according to the instructions in the Service Manual.
Install the wheels on the vehicle and torque to 108 N·m (80 lbf-ft).
Manual 2009 Civic 2 AND 4-Door Aluminum Wheel Instructions Guide. Make your sport car more different and look cool by use this accessories. In this pdf book, you will know how to install with the right way.
Open the driver’s door. Using isopropyl alcohol, clean the area where the accessory tire pressure caution label will attach. Remove the backing from the label and attach it over the existing tire information label. Attach the tire pressure caution label or label C or label D according to the following information:
Label: For EX-L Model with a T125/70D15 95M

Label D: For EX-L Model with a T135/80D16 101M
Attach the “Supplemental Information” page included in this kit to the Owner’s Manual. For the method of attaching the page, refer to “To the dealer:” attached to the “Supplemental Information” page.
MEMORIZING THE TIRE PRESSURE SENSOR ID
Using the HDS and Snap-on TPMS sensor initializer tool, memorize the ID of tire pressure sensor ID according to the instructions in the Service Manual (Memorizing the Tire Pressure Sensor ID).
We found pdf this automotive pdf file from google search engine, and can be found from the original site at here www.hondapartsnow.com. We provide you direct
download from original site here Manual 2009 Civic 2 AND 4-Door Aluminum Wheel Instructions Guide.pdf. We hope this online pdf book will useful for you.


